

How to Find a Water Leak in Your House (Without Guessing or Opening Walls Too Early)
A stain is not a source. It’s a receipt.
Water can travel:
- down a stud bay
- along a pipe
- across a ceiling joist
- through insulation
- and appear several feet away from the actual leak
So the goal is not “find the wet spot.”
The goal is:
Confirm active water movement → classify the leak type → isolate the zone → locate the exact point with minimal damage.
If you’re dealing with active flooding or ceiling dripping right now, start here first:
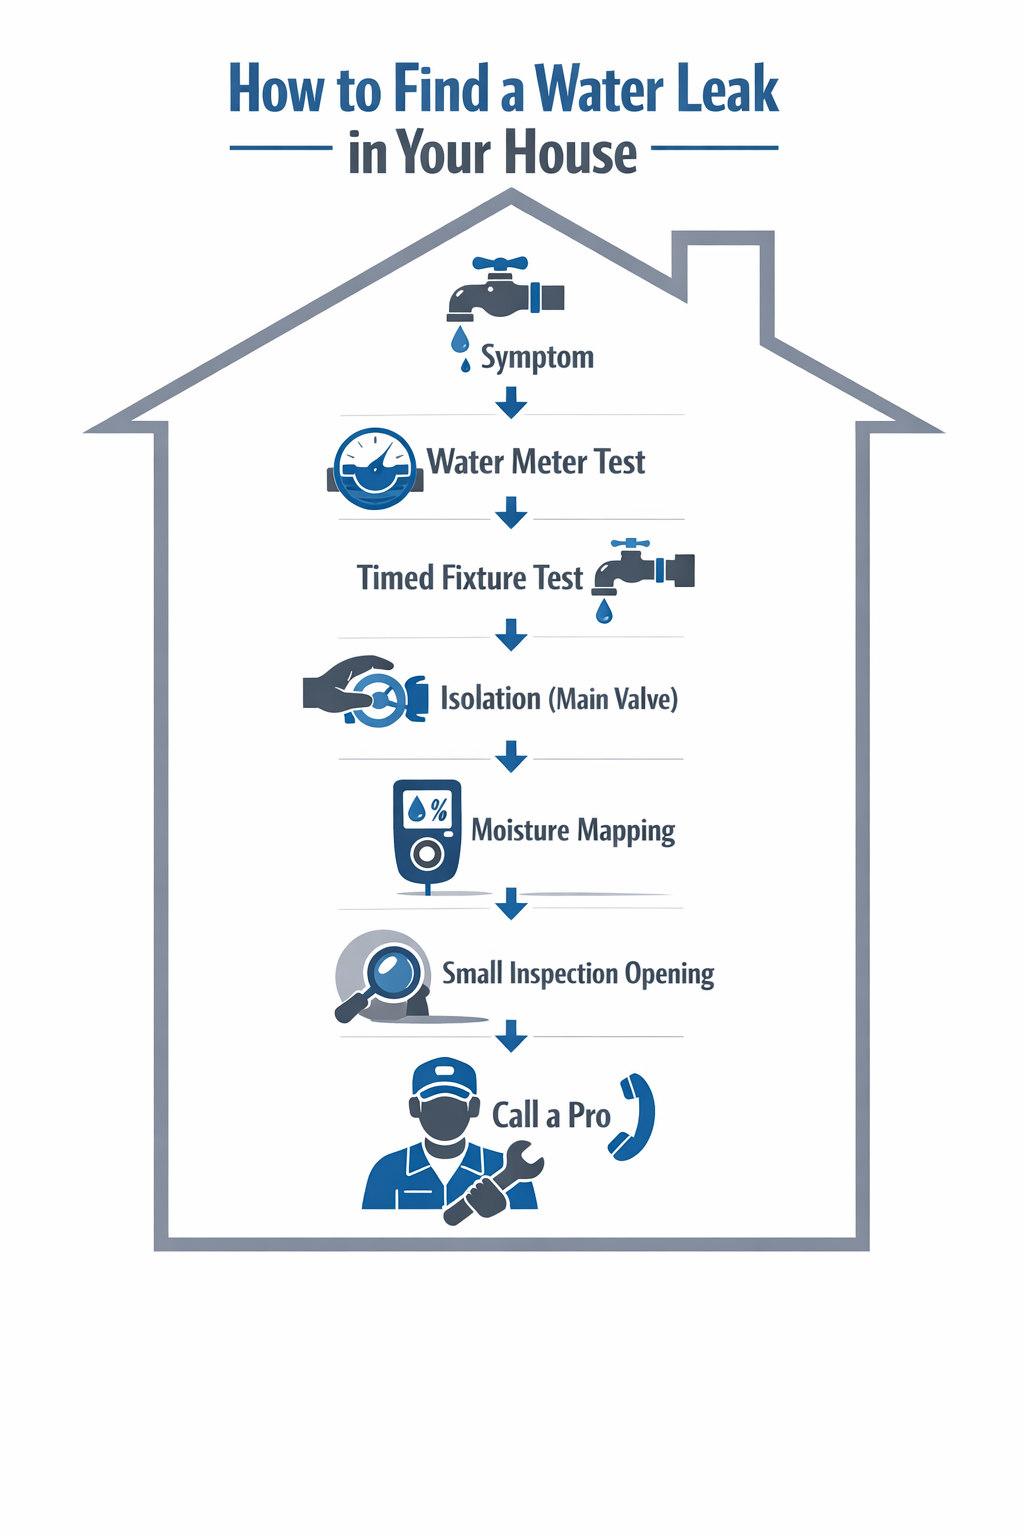
Step 1: Confirm the Leak Is Active (Not Old Damage)
Before cutting anything, confirm water is currently moving.
Do a structured meter confirmation:
- All water OFF (no faucets, appliances, irrigation)
- Watch the leak indicator for 2–3 minutes
- Re-check after 10 minutes
- For strong proof, run a 1–2 hour reading test
If the reading increases → you have active pressurized flow.
Full walkthrough:
Why This Matters (Authority Layer)
Pressurized supply leaks are continuous.
Drain leaks are event-based.
Exterior intrusion is weather-triggered.
If the meter moves when everything is off, the problem is almost always on the pressurized side of the plumbing system.
If the meter does NOT move, you may be dealing with:
- Drain/vent leak (non-pressurized)
- Roof or rain intrusion
- HVAC condensate overflow
- Old staining with no current moisture
That’s why classification comes next.
Step 2: Classify the Leak Type (This Saves Hours)
Most leak hunts fail because people treat all leaks the same.
There are three primary leak categories:
1) Pressurized Supply Leak (Meter Usually Moves)
Source examples:
- Copper/Pex line failure
- Loose fitting
- Valve stem drip
- Toilet fill line
- Ice maker line
- Slab pipe
Characteristics:
- Continuous
- Often subtle at first
- May cause pressure drop
2) Drain / Vent Leak (Meter Often Does NOT Move)
Source examples:
- Shower drain gasket
- Tub overflow plate
- Sink P-trap
- Dishwasher drain hose
- Vent stack crack
Characteristics:
- Appears only during use
- Usually tied to showers/laundry cycles
- May worsen slowly over time
3) Exterior Intrusion / Condensation (Meter May NOT Move)
Source examples:
- Roof flashing
- Window failure
- Siding penetration
- Attic condensation
- Sweating HVAC ducts
Characteristics:
- Rain-dependent
- Seasonal
- Often misdiagnosed as plumbing
Fast Diagnostic Table
What You Notice | Most Likely Type | Do This Next |
Meter increases with all water OFF | Pressurized supply | Go to Step 5 |
Stain worsens after showers only | Drain/overflow | Run timed shower test |
Stain appears after rain | Exterior intrusion | Inspect attic/window path |
Musty smell + baseboard swelling | Ongoing hidden moisture | Moisture-map wall |
Warm spot on slab | Slab leak | Stop DIY early |
Toilet randomly refills | Toilet supply leak | Dye test + isolation |
Need quick routing:
water-leak-in-house-who-to-call
Step 3: Controlled High-Probability Sweep (10 Minutes)
Start with statistically common failures.
Bathrooms
- Toilet supply valve
- Tank bolts and flapper
- Sink shutoff valves
- Shower valve wall cavity
- Tub overflow gasket
Kitchen
- Under-sink supply lines
- Dishwasher drain loop
- Fridge water line
- Garbage disposal flange
Laundry
- Washer hoses (especially behind unit)
- Standpipe drain overflow
Water Heater
- T&P discharge
- Drain valve
- Supply connectors
- Pan overflow
If visible active dripping is found, isolate and repair.
If not, move to controlled tests.
Step 4: Timed “Use Tests” (For Drain Leaks)
Drain leaks do not show on the meter because they occur after the fixture valve.
Run one test at a time.
Timed Shower Test
- Ensure surrounding surfaces are dry.
- Run shower for 5–8 minutes.
- Stop.
- Wait 10–15 minutes.
Check below and adjacent areas.
If moisture appears only after showers, suspect:
- Drain gasket
- Overflow seal
- Shower pan liner
- Valve penetration
Dishwasher / Laundry Test
Run one full cycle while monitoring adjacent walls and flooring.
If moisture appears only during drain cycle → suspect drain connection.
Isolation through time sequencing is critical.
Step 5: Isolation Test (Inside vs Irrigation vs Service Line)
If meter confirms flow, isolate mechanically.
A) Turn Off House Main
If meter stops → leak is inside.
If meter continues → suspect irrigation or service line.
B) Shut Off Irrigation
If meter stops → irrigation leak.
If it continues → service line likely.
Next step:
underground-water-leak-detection
Step 6: Ceiling Stain Trap (Upstairs vs Roof vs HVAC)
Ceiling stains mislead frequently.
If stain is below bathroom:
Likely:
- Shower drain
- Overflow
- Supply drip
- Toilet seal
If stain appears only after rain:
Likely:
- Roof flashing
- Vent boot
- Skylight seal
If near HVAC vent:
Possible:
- Sweating duct
- Condensate overflow
- Improper insulation
Pattern recognition prevents unnecessary wall cutting.
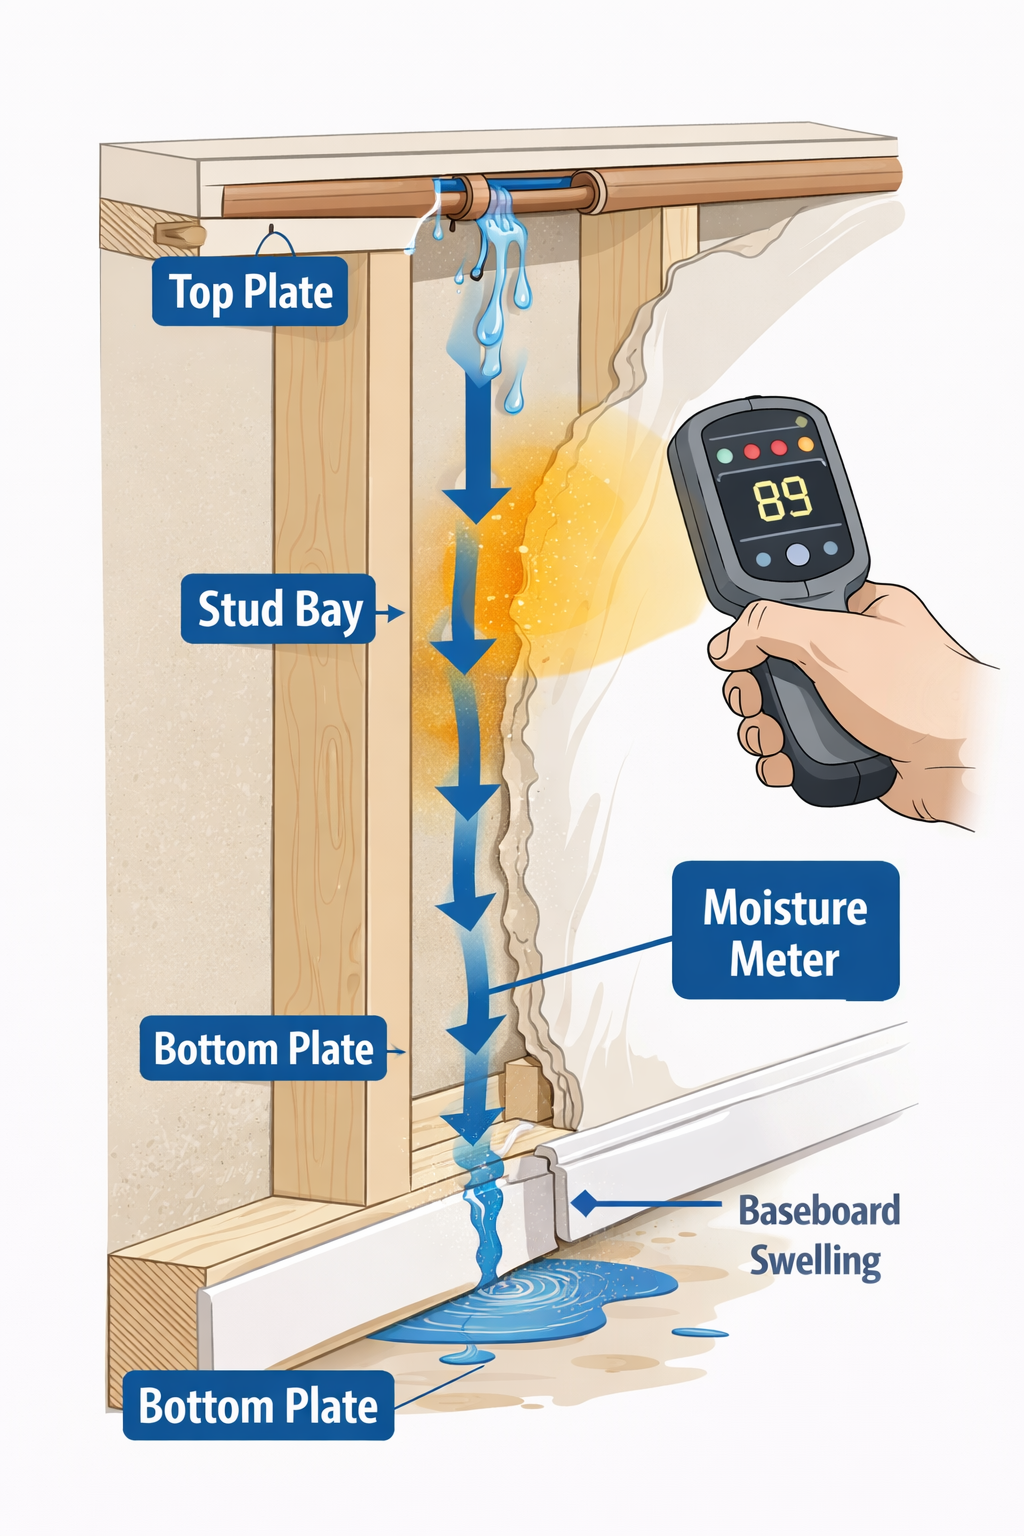
Step 7: How to Find a Water Leak Inside a Wall (Non-Destructive First)
Most drywall damage happens from premature cutting.
A) Read the Framing Path
Water follows:
- Gravity
- Stud cavities
- Bottom plates
- Joist channels
The wettest area is often the lowest, not the source.
Source is typically above the highest moisture reading.
B) Moisture Map the Wall (Best DIY Tool)
Use a moisture meter.
Scan in a grid pattern:
- Start at visible damage
- Move left/right
- Move upward
- Mark highest readings
Follow the increasing gradient upward.
That’s your likely stud bay.
C) Thermal Imaging (When Valuable)
Thermal cameras help when:
- Leak is active
- Wall is exterior-facing
- Pipe carries cold water
They show temperature differential from evaporation cooling.
Not perfect — but powerful when used correctly.
D) Acoustic Listening (Advanced DIY)
At night:
- Turn off HVAC
- Turn off appliances
- Listen for rhythmic dripping or faint hissing
Pressurized leaks often produce subtle vibration sounds.
If audible but unlocatable → professional acoustic tools required.
E) Small Inspection Opening (Last DIY Step)
Only after narrowing to one cavity.
Cut a 2×2 inch inspection opening at the lowest safe location.
Insert borescope upward.
If active spray is visible:
Shut off house main.
Call for repair.
Do not cut exploratory holes randomly.
Tool Comparison
Tool | Best For | When Worth It |
Moisture meter | Mapping wet zones | Anytime wall leak suspected |
Borescope | Confirming cavity leak | After narrowing to one bay |
Thermal camera | Finding damp paths | When leak path unclear |
Acoustic detection | Pressurized hidden leaks | When hearing flow but no visual |
Professional detection | Slab/service line | When isolation fails |
When NOT to Cut Into a Wall
Do not open walls if:
- Active leak not confirmed
- Pattern is rain-only
- You haven’t moisture-mapped
- Electrical risk is present
- Slab leak suspected
Drywall repair often costs more than detection.
Stop / Call Boundary (Hard Rules)
Call a pro if:
- Active flow confirmed but not isolated in 60–120 minutes
- Slab leak suspected
- Leak near electrical panels
- Ceiling sagging
- Service line suspected
Start here:
water-leak-detection-services
Cost expectations:
water-leak-detection-cost
What to Tell the Pro (Efficiency Layer)
Provide:
- Meter results (10 min + 1–2 hr)
- Whether house main stops meter
- Timed fixture results
- Highest moisture readings
- Photos
This reduces exploratory labor.
Common Time-Wasting Mistakes
- Treating stain as source
- Skipping meter confirmation
- Cutting drywall too early
- Mixing fixture tests
- Ignoring toilet supply lines
Limitations
- Intermittent leaks may require overnight observation
- Drain leaks do not register on meter
- Exterior intrusion mimics plumbing
- Slab/service line leaks require specialized equipment
FAQs
How do I find a water leak inside a wall without cutting drywall?
Confirm active leak via meter or timed use test, moisture-map the wall to identify the highest readings, then narrow to one stud bay before making a small inspection opening.
Why is my wall wet but the water meter isn’t moving?
It may be a drain/overflow leak, rain intrusion, HVAC condensate issue, or old damage. Run timed tests and observe rain patterns.
What’s the most common hidden leak in a house?
Toilet tank leaks, fridge water lines, shower valve bodies, and under-sink shutoffs.
Should I open the wall as soon as I see a stain?
No. Confirm active moisture and narrow the cavity first.
When should I stop DIY?
If active flow is confirmed but not isolated quickly, or slab/service line leaks are suspected.