
Ceiling Water Leak Repair: The Full Repair Pathway (Not Just a Patch Job)
A ceiling leak repair has two parts:
- Stop the water at the source (roof, plumbing, drain, HVAC)
- Restore what water damaged (drying, insulation, drywall, texture, paint)
If you repair the ceiling before the source is fixed and the cavity is dry, you’re paying twice.
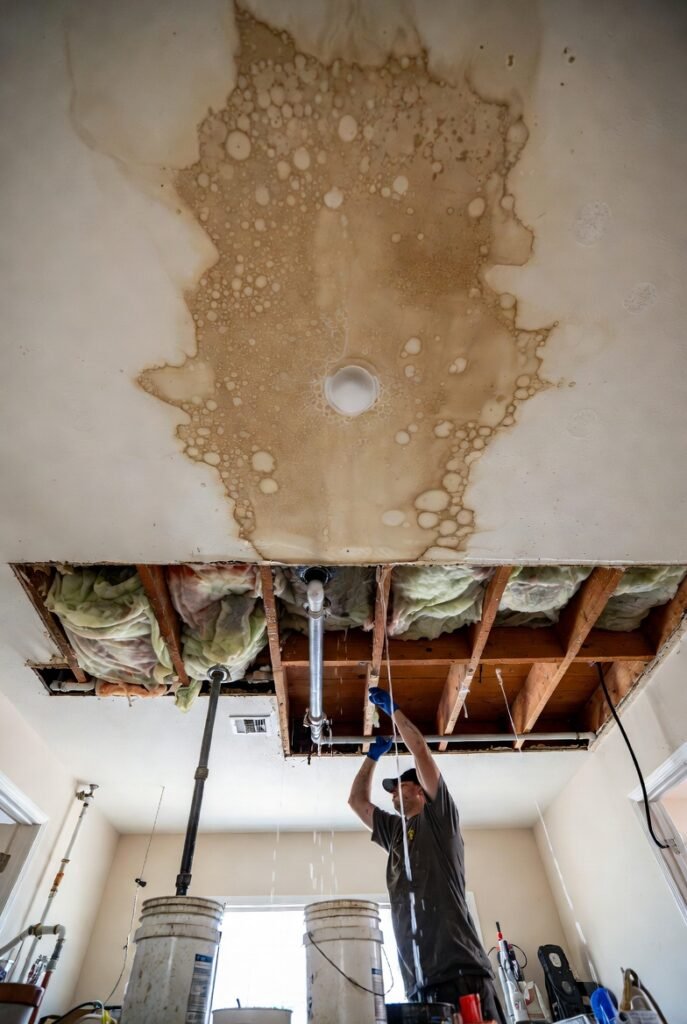
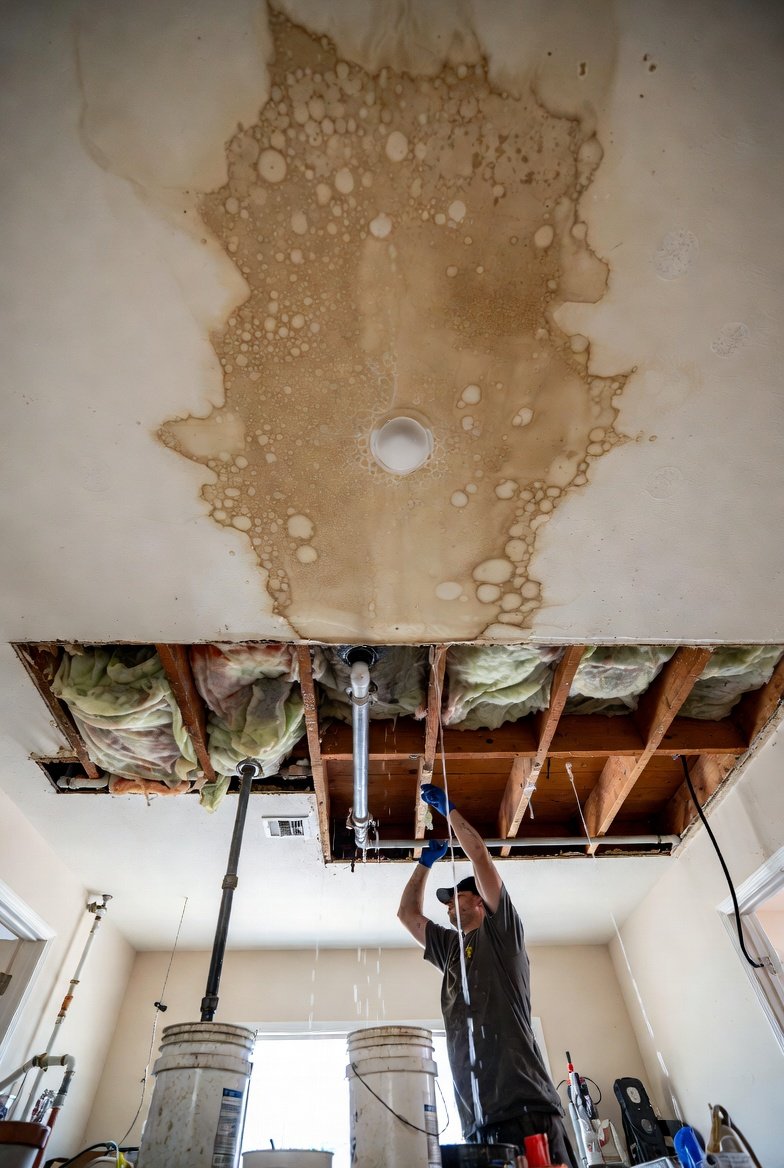
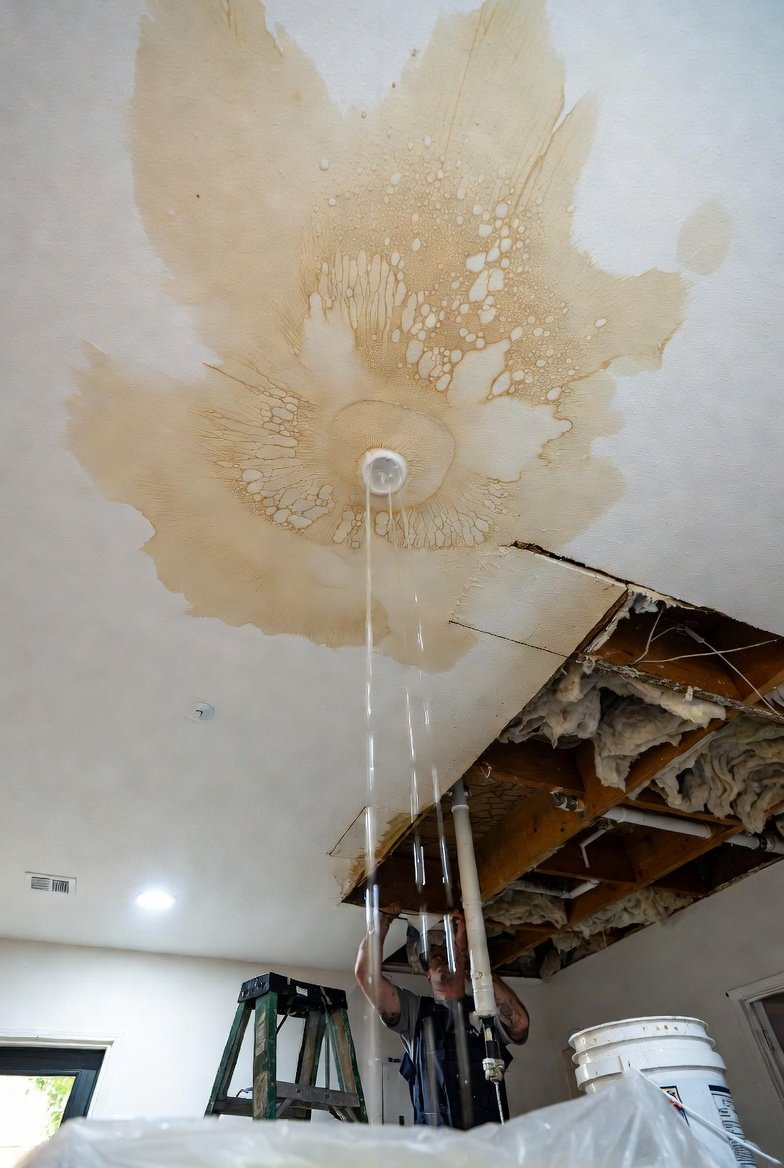
If the ceiling is actively dripping, bulging, or water is near lights/outlets, start with emergency safety steps first:
water-leak-emergency
Step 1 — Make It Safe Before You Touch Anything
Do this first:
- Turn off power at the breaker if water is near lights, fans, outlets
• Place a bucket under active drips
• Move electronics and furniture
• If drywall is bulging, carefully puncture the lowest point (after power is off)
Structural Note
Wet drywall loses strength fast.
Saturated insulation adds weight.
A 4–6 sq ft saturated ceiling section can fail suddenly.
Stop here and call a pro if:
- Sagging spans multiple joist bays
• Water is entering through fixtures
• Drywall is cracking and separating
• You suspect framing damage
Step 2 — Stop the Leak at the Source (Ceiling Repair Starts Upstairs)
The ceiling is rarely the source.
Most ceiling leaks originate from:
- Roof/exterior intrusion
• Plumbing supply leak
• Drain/overflow leak
• HVAC condensation failure
Diagnosis page:
Plumbing confirmation:
water-leak-test
Hidden path logic:
how-to-find-a-water-leak-in-your-house
If isolation fails:
water-leak-detection-services
Never close a ceiling without verified source control.
Step 3 — Drying Comes Before Repair (Non-Negotiable)
Even when dripping stops, moisture remains inside:
- Insulation
• Drywall paper backing
• Ceiling joists
• Fasteners
Closing damp cavities leads to:
- Mold growth
• Recurring stains
• Soft edges and seam failure
• Wood rot
How Pros Verify “Dry Enough”
Professionals don’t guess dryness.
They use:
- Moisture meter readings (compare to unaffected area)
• Visual cavity inspection
• Time-based drying (minimum 24–48 hours for minor exposure)
• Controlled air movement + dehumidification
If insulation is soaked, it is usually removed.
Wet insulation traps moisture and slows drying dramatically.
Drying Time Reality
Damage Level | Typical Drying Window
Minor surface moisture | 1–2 days
Wet insulation | 2–5+ days
Long-term leak | 5+ days
Enclosed cavity, poor airflow | longer
Joint compound and paint cure times also extend schedule.
Step 4 — Choose the Correct Repair Level
Not every ceiling requires full replacement.
A) Stain-Only Restoration
When drywall is firm and dry.
Repair:
- Scrape loose paint
• Sand lightly
• Apply stain-blocking primer
• Repaint (often full ceiling plane for uniformity)
Without stain-blocking primer, ghosting often returns.
B) Partial Drywall Replacement
When drywall is soft, swollen, or sagging.
Repair sequence:
- Cut back to solid joists
• Remove wet insulation
• Dry cavity
• Install new drywall
• Tape + mud (multiple coats)
• Sand
• Prime + paint
Texture blending is often the hardest part.
C) Full Ceiling Plane Replacement
Needed when:
- Multiple bays affected
• Texture cannot blend
• Repeated leak history
• Significant mold remediation
This increases labor but creates uniform finish.
Ceiling Material Matters (Drywall vs Plaster)
Older homes may have plaster ceilings.
Plaster behaves differently:
- Heavier when wet
• More prone to sudden failure
• Harder to patch invisibly
Plaster repairs often require specialized restoration techniques.
Drywall is easier to section-replace.
What Gets Repaired (Full Scope Awareness)
Ceiling leak repair may include:
- Drywall
• Insulation
• Texture matching
• Stain-blocking primer
• Full repaint
• Crown/trim repair
• Electrical inspection
• Mold remediation
If water touched electrical fixtures, inspection is strongly advised.
Repair Timeline (Realistic Sequence)
Stage | What Happens | Time
Safety + containment | power off, drain bulge | same day
Source fix | roof/plumbing/HVAC | same day–several days
Drying | moisture removal | 1–5+ days
Demo | remove damaged materials | hours–1 day
Rebuild | drywall + mud | 1–2 days + dry time
Finish | sand, texture, paint | 1–2 days
Most delays come from drying and mud cure time.
Cost Drivers (Why Quotes Vary Widely)
Ceiling leak repair cost depends on scope variables.
Driver | Impact
Leak source complexity | Roof vs plumbing vs HVAC scope
Damage size | Material + labor volume
Drying equipment | Adds cost
Insulation removal | Labor increase
Texture blending | Skilled labor time
Ceiling height | Access difficulty
Mold remediation | Containment + disposal
Electrical involvement | Safety inspection
Small stain patch ≠ multi-bay rebuild.
Cost overview page:
water-leak-detection-cost
Insurance & Documentation (Often Overlooked)
If damage is significant:
- Photograph before repairs
• Document moisture readings
• Save damaged material photos
• Keep receipts
Insurance may cover sudden water damage but not long-term neglect.
Never discard damaged material until documentation is complete.
What Pros Actually Do (Sequence Control)
A good contractor:
- Confirms leak source is fixed
- Verifies moisture levels
- Removes only compromised material
- Executes drying plan
- Installs drywall correctly
- Blends texture under proper lighting
- Uses stain-block primer
- Paints for uniform finish
If choosing who to call:
water-leak-in-house-who-to-call
Mold & Safety Rules
Hard boundaries:
- Visible mold → do not seal it in
• Electrical contact → keep power off
• Heavy sagging → drain and avoid standing underneath
Mold risk increases within 24–48 hours if materials remain wet.
DIY vs Pro Decision Matrix
DIY OK when:
- Small stain
• Firm drywall
• Leak fully resolved
• No electrical involvement
• Flat ceiling, easy access
Hire pro when:
- Sagging or soft drywall
• Source unclear
• Insulation soaked
• Texture matching critical
• Electrical involvement
• Leak lasted >24–48 hours
• Mold suspected
Post-Repair Monitoring (Final Layer)
After repair:
- Monitor for stain reappearance
• Check attic during next rain
• Run AC and observe
• Verify no musty odor
Recurrent staining means source was not fully resolved.
Limitations
- Ceiling repair fails if moisture remains
• Texture blending may show under side lighting
• Stains bleed through without primer
• Water may travel along framing far from visible damage
FAQs
How do you repair a ceiling after a water leak?
Fix the source first, dry the cavity fully, remove damaged materials, replace drywall, finish seams, match texture, prime with stain blocker, and repaint.
Can I just paint over a water stain?
No. Use stain-blocking primer after confirming dryness.
How long should I wait before repairing drywall?
Until moisture levels normalize and the cavity is dry. Minor exposure may dry in 1–2 days; saturated cavities take longer.
What if the leak stopped but the ceiling is still sagging?
Sagging usually means drywall strength is compromised and replacement is required.
Do I need to replace insulation?
If soaked or compressed, yes. Wet insulation traps moisture.
When should I call a professional?
If sagging is significant, insulation is soaked, source unclear, electrical involved, or mold suspected.